01
Q1 · What is this?
A camera that captures the answer, not the picture
In one plain sentence, then grounded all the way down to earth.
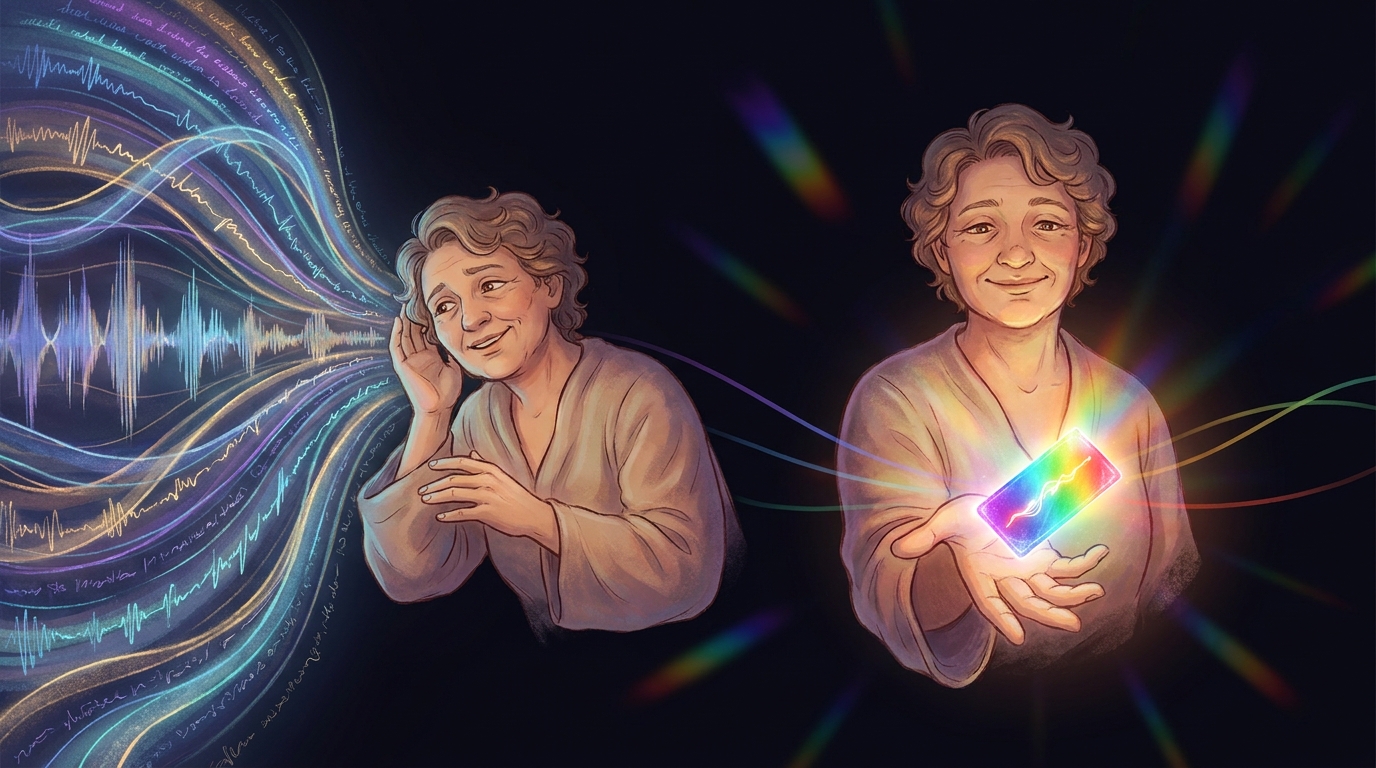
PhotonLayer is a deterministic optical-AI front end: a learned piece of "smart glass" reshapes incoming light so a tiny sensor captures the answer instead of the whole picture — then signs a receipt proving exactly what it measured.
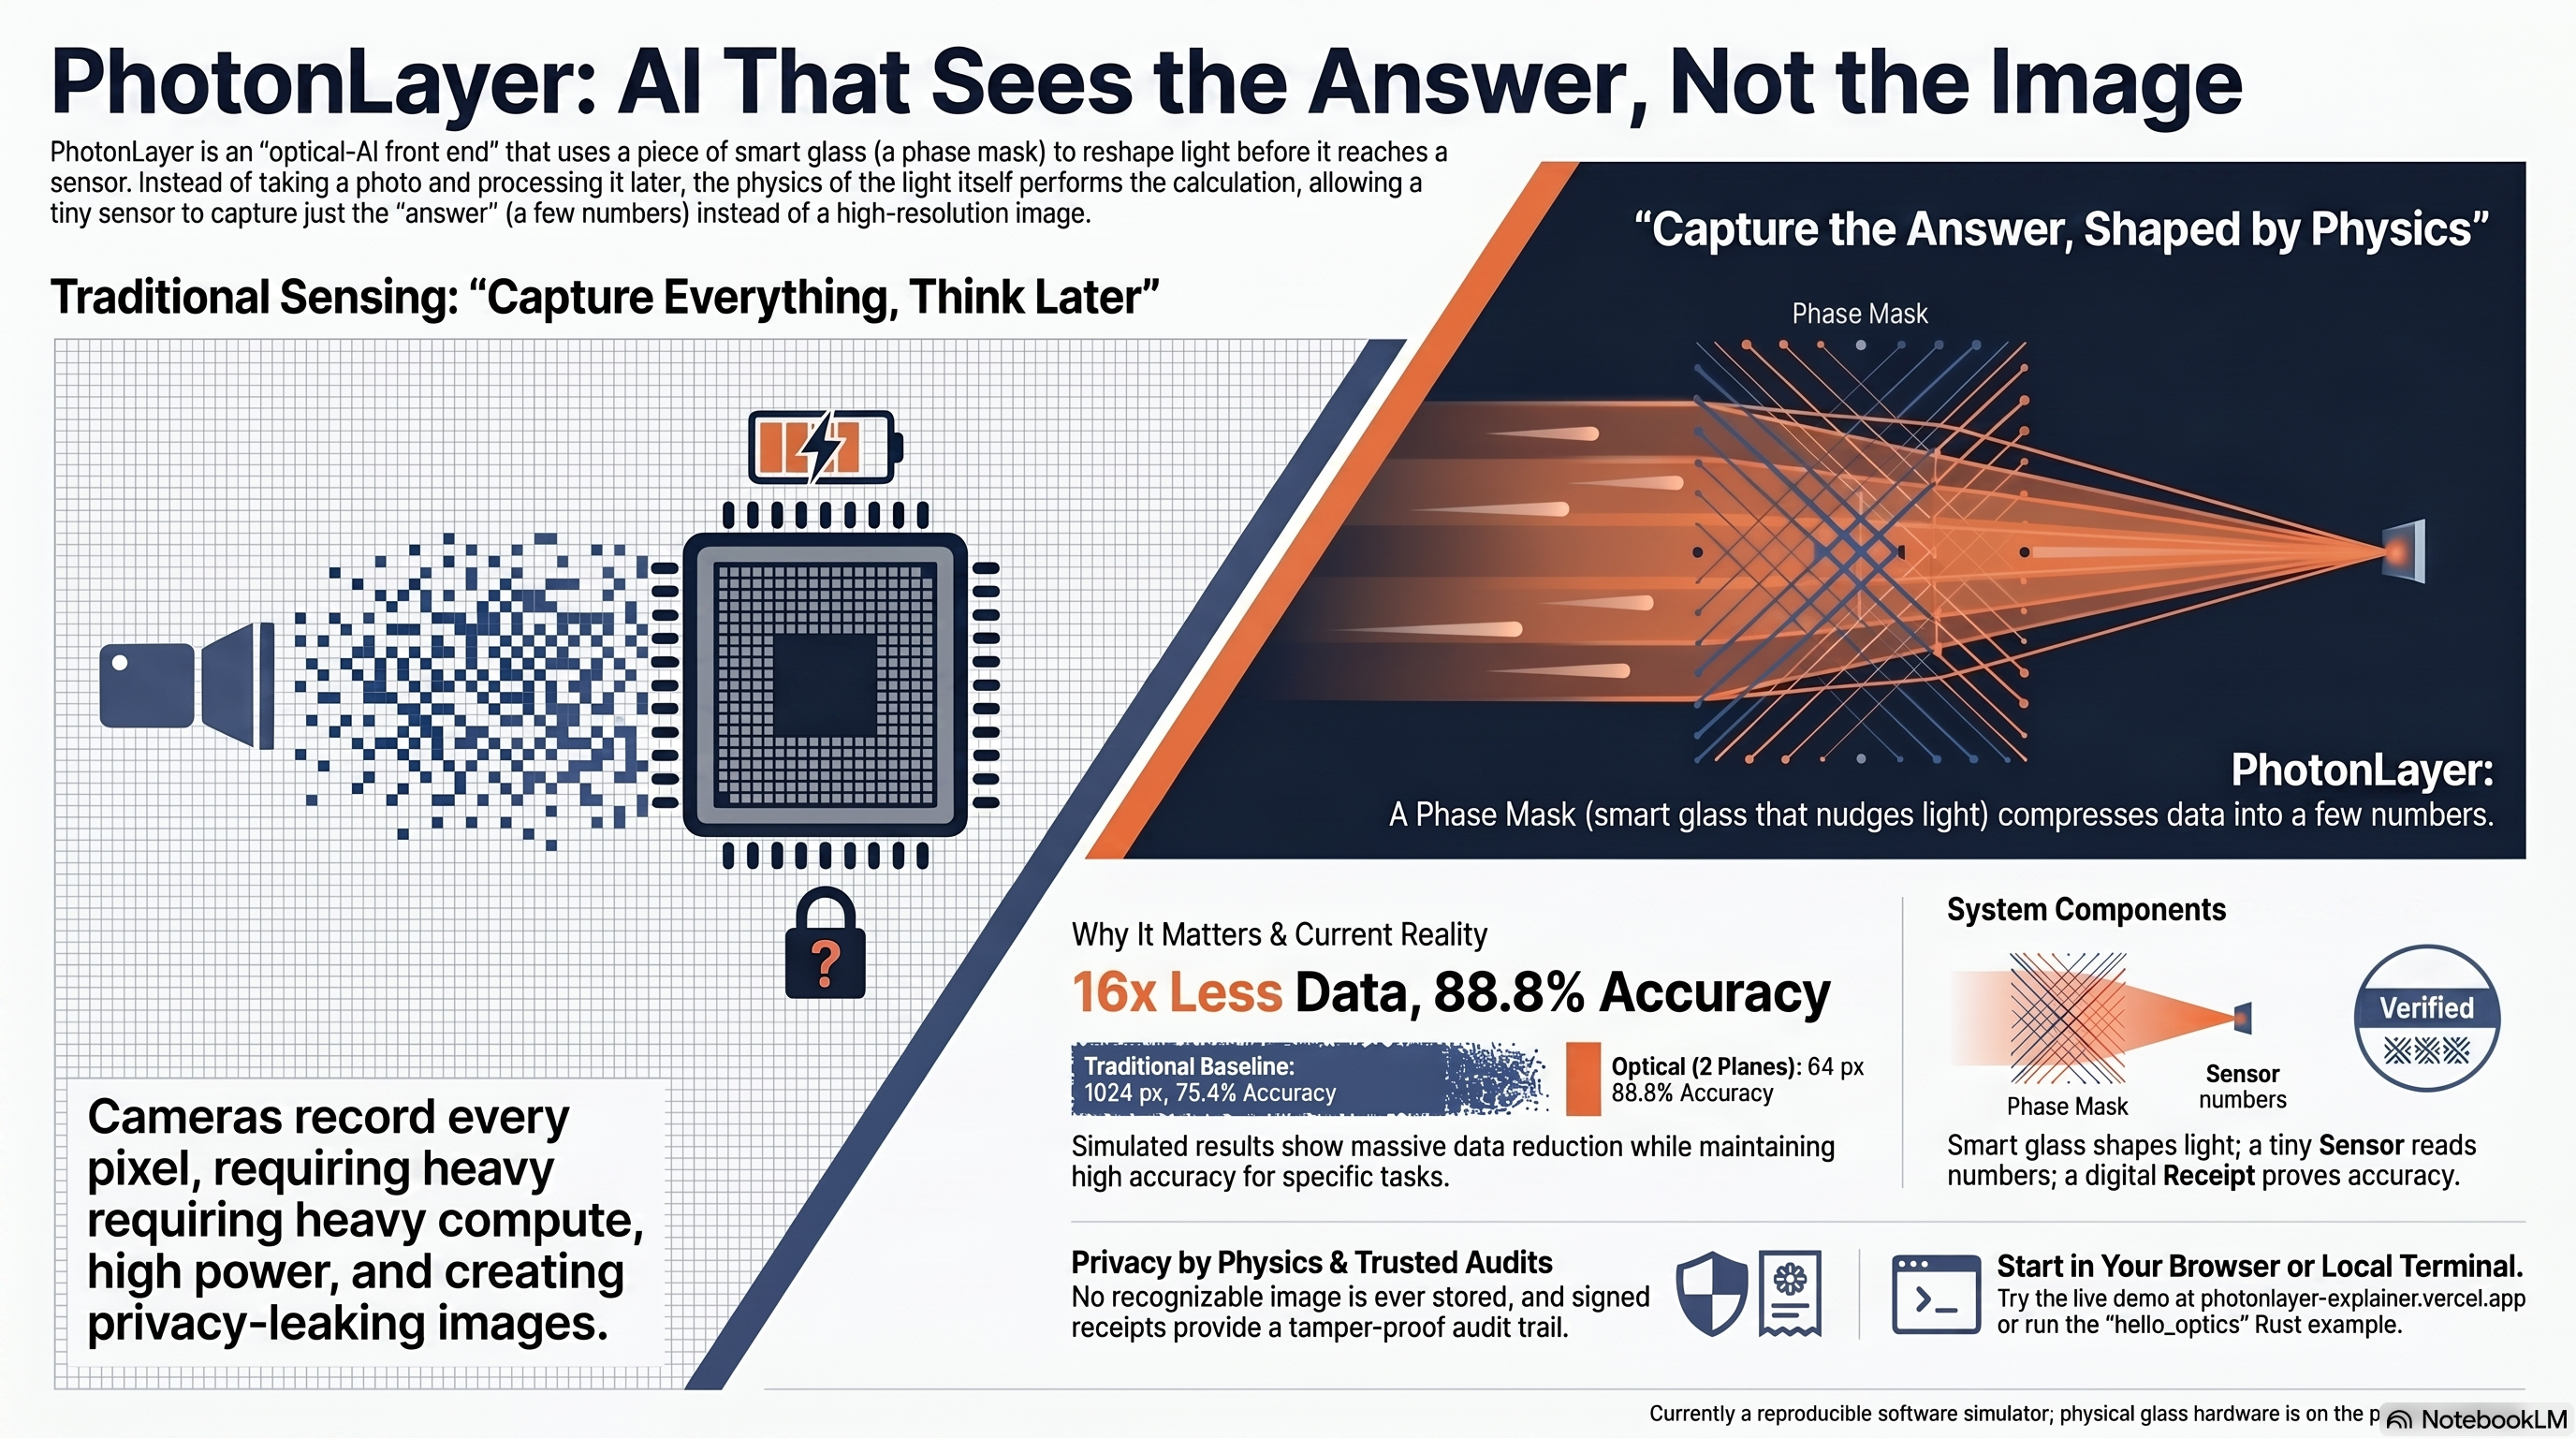
Here's the everyday version. A normal camera records every pixel of a scene, then a computer reads all of them to decide what it's looking at. That's a lot of data to move, store, and process — and the picture itself can leak (it's a viewable photo of you or your scene).
PhotonLayer flips the order. It puts a specially-shaped, trained piece of glass — a phase mask — in front of a small sensor. The glass bends the incoming light so that, by the time light lands on the sensor, the useful information has already been squeezed into just a handful of numbers. A tiny program reads those numbers and gives the answer.
The repo's own analogy: it's like a translator who listens to a whole speech and hands you a one-line summary — you never needed the full transcript to act on it. The "lens" is trained by trial-and-improvement to do that summarizing in the light itself, before anything is digitized.
02
Q2 · What problem does it solve?
Every camera-based AI pays the "capture everything, then think" tax
Bandwidth, power, storage — and a recoverable image of whatever it looked at.
Today's pattern is always the same: grab the whole picture, then compute on all of it. That single design choice creates four costs you can't avoid.
| The cost | Why it hurts |
|---|---|
| Bandwidth | Thousands of pixels per frame have to be read off the sensor and moved. |
| Power & compute | A processor chews through every pixel before it can decide anything. |
| Storage | Full frames pile up — more to keep, more to secure. |
| Privacy | A stored frame is a viewable photo of whatever it saw — a recoverable image of you, your documents, your scene. |
PhotonLayer is a proof-of-concept for capture-the-answer sensing: do the first chunk of "figuring out what's in the picture" in the light, so the sensor only ever captures a tiny compressed measurement (e.g. 64 numbers instead of 1,024 pixels), and the stored thing is a measurement, not a viewable photo.
03
Q3 · Why is that a problem now?
Cameras-with-AI are everywhere — and "trust me, that's what it measured" no longer cuts it
Edge sensing is exploding, privacy rules are tightening, and results need to be provable.
Three pressures collide right now, and the "capture everything, then think" design sits in the worst spot for all three.
- Sensing moved to the edge. Doorbells, conveyor belts, drones, wearables — tiny battery- and bandwidth-limited devices are doing vision. Reading and crunching a full frame per item is exactly the budget they don't have.
- Privacy is now a liability, not a footnote. A stored full frame is a recoverable photo. The cheapest way to not leak a picture is to never capture one in the first place — capture a measurement that doesn't look like the scene.
- Results need to be provable. As AI makes more real decisions, "the model said so" isn't enough. You need to show exactly what was measured and that it wasn't tampered with — a re-runnable experiment, not a screenshot.
PhotonLayer is the only proof-of-concept in this space that ships with bit-reproducible, signed receipts, so a result is a re-runnable experiment, not a claim. It reproduces a genuine research result — a single-layer ceiling-break to 83.3%, multi-plane 88.8%, all at 16× compression, all deterministic, from clean in ~24–62 seconds — and is unusually candid about exactly what it does and doesn't prove.

04
Q4 · How does it solve it?
A trained phase mask does the first transform inside the light
"Phase mask," diffraction, sensor, decoder, receipt — each one in plain terms, then exactly.
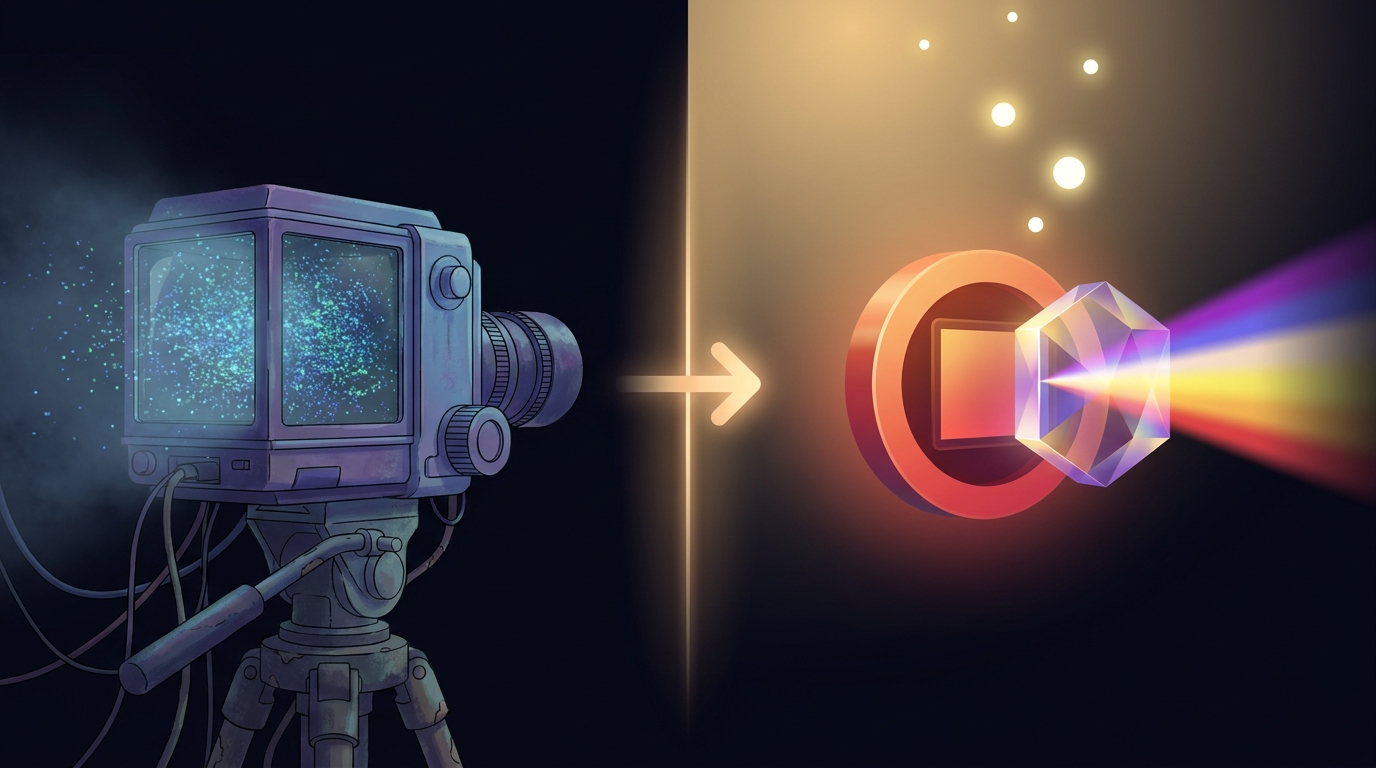
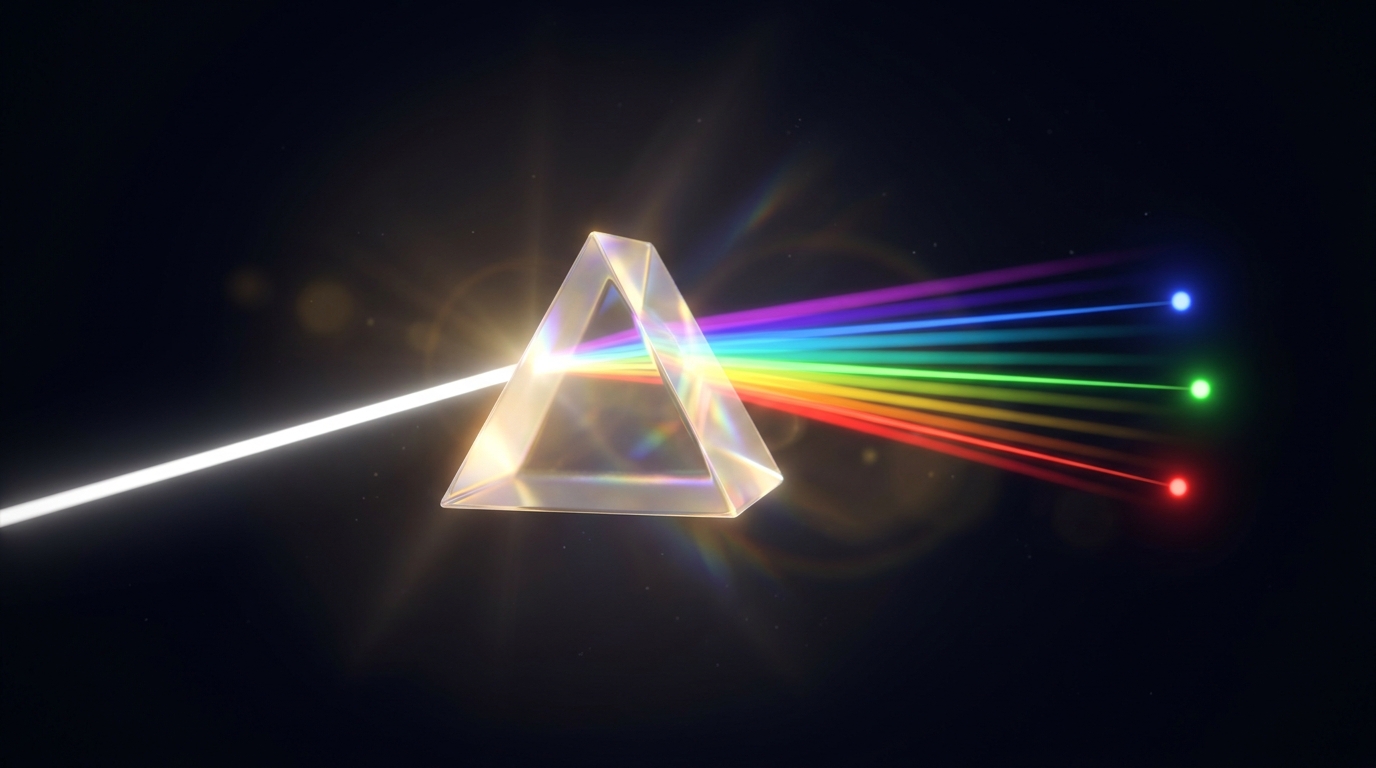
"Phase mask," in plain terms: a flat piece of optics whose surface is patterned so it nudges different parts of the light wave to arrive slightly early or late — and that pattern is what gets learned for your specific task.
photonlayer-core: a learned phase profile θ(x,y) shifts the wave per region, scalar diffraction propagates it (Fresnel / Fraunhofer / Angular-Spectrum via a deterministic FFT), the sensor bins down to ~64 values, and a tiny decoder reads the class.How the mask gets good: trial-and-improvement, then real gradients
A random mask already works a bit. To make it actually good at separating your classes, PhotonLayer trains the mask two ways:
- Hill-climbing — try a small tweak, keep it only if accuracy improves. Simple, but it plateaus at an optimizer ceiling (~73%).
- Analytic gradient descent — train the mask through a proven adjoint of the diffraction operator (
Propagator::backward_into, validated by an exact-adjoint identity and a finite-difference grad-check). This clears the ceiling decisively, to 83.3% single-plane. - Multi-plane cascade — stack phase planes with free-space propagation between them, trained end-to-end through the composed adjoint. Each plane sees a genuinely different field (decorrelated to ~0.04), reaching 88.8% with 2 planes.
05
Q5 · What does a solved state look like?
Fewer pixels, a measurement that isn't a photo, and a receipt you can re-run
The before → after, stated as concrete, measured numbers from the repo.
"Solved" isn't abstract here — it's a set of measured numbers you can reproduce.
Before · normal camera + AI
Read 1,024 pixels per frame. Compute 10,240 MACs in the decoder. Store a full, viewable photo. Result is a claim — "trust the model."
After · PhotonLayer
Read 64 pixels (16× fewer). Compute 640 MACs (16× fewer). Store a measurement that doesn't look like the scene. Result ships with a signed, re-runnable receipt.
| Measured on real MNIST (16× compression) | Sensor px | Decoder MACs | Accuracy |
|---|---|---|---|
| Full-image baseline (same tiny decoder) | 1024 | 10,240 | 75.40% |
| Optical, hill-climbed mask | 64 | 640 | 73.05% |
| Optical, gradient-trained (single plane) | 64 | 640 | 83.30% |
| Optical, 2-plane cascade | 64 | 640 | 88.80% |
06
The "oh — that's what it's for" moment
Priya runs a small recycling line
One named, ordinary person. A real before → after. No optics degree required.
Priya runs a small recycling line. A camera over the conveyor belt has to spot which bin each item belongs in. She's not an optics engineer; she just needs the sorter to be fast, cheap, and not a privacy headache — the belt sometimes carries documents and personal items.
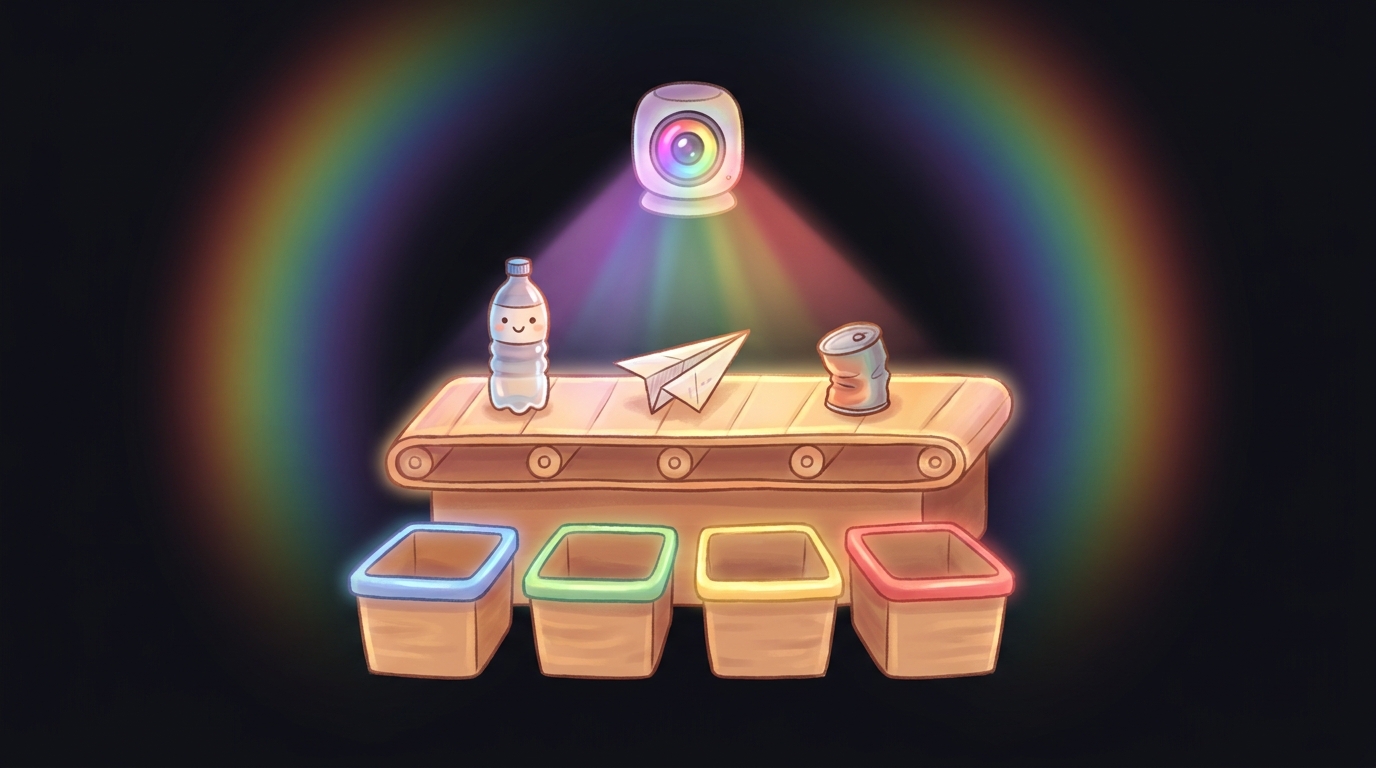
Before
The camera grabs a full image of every item — thousands of pixels each — and a computer chews through all of them to decide "plastic / paper / metal / glass." That's a lot of data per second, a chunky processor, and a stored photo of everything that went past, including the personal stuff. It works, but it's heavy, power-hungry, and the stored pictures make her lawyer nervous.
After PhotonLayer
Priya's team designs a learned phase mask for exactly this 4-way sort. Now the sensor captures a few numbers per item — a measurement already shaped to separate the four classes that does not look like the item (you can't read a document off it). A tiny decoder reads "paper" off those numbers. Each run also emits a signed receipt, so she can prove to an auditor exactly what was measured.
The "oh, that's what it's for" line: It's the difference between a camera that photographs the scene and then thinks about it, and one where the lens already did the thinking — so all that's left to capture is the answer.
07
Q6 · Where else does this apply?
A gallery of real, runnable uses
Eight scenarios — each its own card with its own visual. Every command is real and runs offline on the built-in synthetic data.
Open any card to see the situation, the exact command, what it does, and a diagram of what happens. (Per examples/README.md: "every one compiles, runs offline, and none print fabricated numbers.")
1See the compression with your own eyesphotonlayer-core
2Train the glass to be good at your taskphotonlayer-bench
3Break the ceiling with real gradient training (the headline)photonlayer-bench
4Go deeper — a multi-plane optical cascadephotonlayer-bench
5Probe how much the measurement leaks (privacy-by-physics)photonlayer-bench
6Run the flagship consented-verification demo (with a signed receipt)photonlayer-cli
7Prove a result wasn't tampered withphotonlayer-core
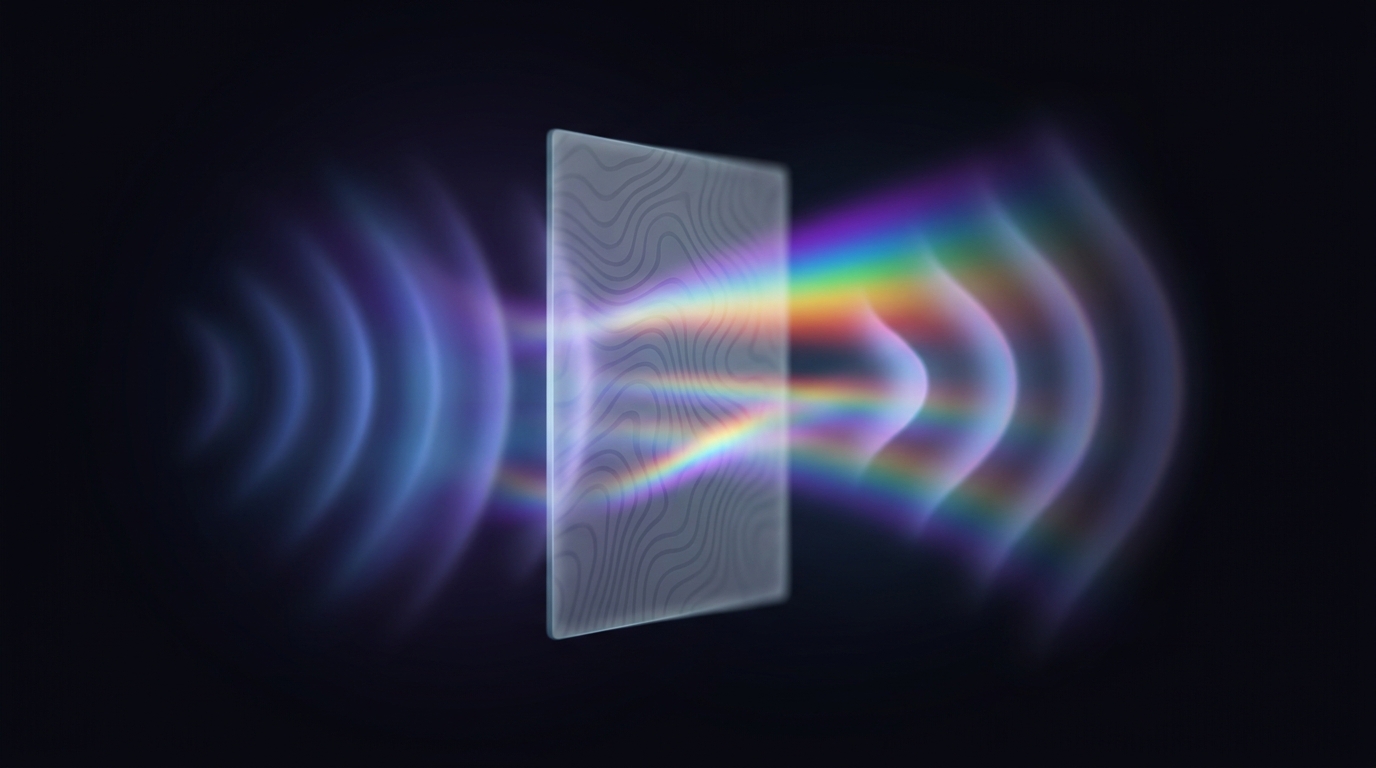
8Watch the physics: how light spreads as it travelsphotonlayer-core
08
"I already have a camera + AI — why this too?"
Why this vs. the tools you already have
Answered head-on: vs a normal camera+CNN, and vs "an optical neural network."
| You might already use… | What PhotonLayer changes |
|---|---|
| A normal camera + a CNN | A normal camera captures the whole scene then computes. PhotonLayer captures far less by doing the first transform in the optics, and stores a measurement that need not look like the scene. The repo's words: "sees enough to decide, but captures far less than a full image." |
| "An optical neural network" | The repo deliberately positions itself as NOT that. Its wedge is "auditable optical compression for task-useful sensing" — narrower and "far more defensible." Multi-layer 97–99% diffractive networks are explicitly out of scope. It doesn't compete on raw accuracy. |
| Any of the above | The one thing nothing else here gives you: bit-reproducible, signed receipts. Every run hashes its inputs/outputs into a tamper-evident digest, so a result is a re-runnable experiment, not a screenshot. That's the stated moat. |
09
Q · How would you implement it?
What's actually inside — the four real crates
PhotonLayer is Rust crates, not a zip-of-models. Here's the real file-tree, each part in plain English.
One Rust workspace, four crates. This is the actual layout (from the README "Crates" table and Cargo.toml) — annotated so you know what each one is for.
Use it in your own Rust project
Add the core crate and call the simulator directly. Re-running yields a bit-identical frame_hash — that's the determinism guarantee.
use photonlayer_core::prelude::*;

let frame = ScalarSimulator.simulate(&img, &mask, &cfg)?;
// re-run with the same inputs → identical frame.frame_hash
// build & verify a tamper-evident receipt of exactly what ran:
let receipt = Receipt::build(&img, &mask, &cfg, &frame);
assert!(receipt.verify());
core as the engine and bench / cli / wasm as three ways to put your hands on it — prove it, type at it, or click it in a browser.core is the engine. bench proves it, cli drives it from a terminal, and wasm runs it in a browser — every front door calls the same deterministic core.
10
Q7 · How do you start?
Three ways to start — all real, all in the README
Pick by how much you want to install: zero, a 30-line tour, or a dependency.
- No install — try it in your browser. Open the live demo ↗ — it runs entirely via WASM. Shape light through a mask, watch it compress to a tiny measurement, and verify the deterministic receipt.
- 30-line local tour. Run the minimal pipeline and see that a re-run is bit-identical:
$ cargo run --release --example hello_optics -p photonlayer-corecopy
- Use it in your own Rust project.
cargo add photonlayer-core, then callScalarSimulator.simulate(&img, &mask, &cfg)— re-running yields a bit-identicalframe_hash.
crates/photonlayer-bench/data/mnist/ first (see each test header). Without them, the examples skip cleanly (never panic) and run on synthetic data.
11
Take it with you · a studio to explore, one download to keep
The NotebookLM studio & the drop-in: watch, listen, read — then take the whole thing
A public NotebookLM studio (🎧 audio · 🎬 video · 🖼 slides · 📊 infographic · 📄 report) plus a one-zip drop-in: for-humans/ (primer + studio media) and for-ai/ (a searchable KB you wire into Claude Code in three steps).
for-humans/ (primer + studio media) and for-ai/ (a searchable KB you wire into Claude Code in three steps).Generated with Google NotebookLM · grounded in the same source repo
A full NotebookLM studio for PhotonLayer
Audio overview, an explainer video, a slide deck, an infographic and a written report — all in one place, all built for a curious newcomer. No account, no setup: just open it and explore.
- 🎧 Audio overview
- 🎬 Explainer video
- 🖼 Slide deck
- 📊 Infographic
- 📄 Written report
🎬 Explainer video
A short, plain-language walkthrough — what PhotonLayer is, the before→after, why it matters, how to start.
📊 The whole idea on one page
The before→after at a glance: a camera that records every pixel vs. light pre-shaped so a tiny sensor reads only the answer — 16× less data, privacy by physics, a signed receipt.
🖼 Slide deck for a newcomer
A 12-slide deck that walks the idea from "what is this?" to "how do I try it?" — built for someone seeing optical AI for the first time.

This is the real file-tree of the download — every file, in plain English. The studio media is highlighted: play the audio overview first, it's the gentlest way in.
Inside for-humans/studio/ — start here
- 🎧 photonlayer-audio.m4a — a NotebookLM audio overview that walks Priya's recycling-line story end to end. Play this first..m4a
- 📊 photonlayer-infographic.png — the whole idea on one landscape page: the before→after of raw camera data vs. pre-shaped light..png
- 🖼 photonlayer-slides.pdf — a newcomer-friendly deck: what PhotonLayer is, why it matters, how to start..pdf
- 📄 photonlayer-report.md — the written deep-dive: the four crates, the measured results, and the honest limits, all grounded in the repo..md
The explainer video is large, so it lives in the public NotebookLM studio (linked from the zip's README) rather than inside the download.
Three steps to wire the AI half into Claude Code
- Unzip & install:
$ unzip photonlayer-dropin.zip && cd photonlayer-dropin/for-ai && npm installcopy
- Point Claude Code at it with a
.mcp.jsonin your project root that runsfor-ai/kb-mcp-server.mjs. - Add a one-line gate to
CLAUDE.md: "Before answering anything about PhotonLayer, query thephotonlayer-kbtool and ground the answer in what it returns."
Prefer the terminal? Query it directly, no Claude Code needed:
for-humans/ is a primer plus a studio (🎧 audio + 📄 report) a person reads and listens to; for-ai/ is the same knowledge as a searchable .rvf + MCP server your assistant queries — so it answers from the real source instead of guessing.
12
In the repo's own words — don't soften them
Honest limits
PhotonLayer is unusually candid about what it does and doesn't prove. So is this page.
libm transcendentals (sin/cos/atan2) differing by a ULP.